Low Temperature SMD & Thru-Hole Removal. Available Also in a Lead-Free and RoHS Compliant Formulation!
Step
1
Always Preheat First.Place your PCB into your fixture above the
ZT-1 AIRBATH
as shown at the left. Begin the preheat process by flipping the
rocker switch the "Warm." mode (Recommended setting:
150°C)
Step 2A
Dip Swab Into Flux. As PCB pre-heats, insert a small anti-static foam swab into flux
as shown. (Recommended: A thin anti-static foam swab and tack
flux
(No-Clean Flux).
Step 2B
Apply Flux. Make application of flux to each lead/land interface of the targeted SMD to be removed. (Note: For graphic contrast, a white foam swab is shown at left).
Step 3A
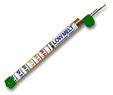
Select LOWMELT®. Take a strand of
LOWMELT® DeSolder wire from tube as shown in the right photo. (Note: Only use certified Zephyrtronics alloy.)
Step 3B
Apply LOWMELT®.Using economy and in a random manner, melt
LOWMELT® into existing joints of the SMD only as each lead requires. Co-metalization begins.
Step 3C
Because some joints will always have more solder than others, some leads will need more
LOWMELT®. Typically (not always), an SMD's four corners need a bit more.
Step
4
Lift and Remove SMD.
Using a soft suction lifting device such as the
ZT-3-MIL AIRPICK, lift SMD up and off of the PCB. (Note: Use of the ESD safe ZT-3 guarantees no lifting of pads.)
Step
5A
Easy Clean Up.Dip Swab Into Flux. Maintaining pre-heating at 150°C, insert anti-static foam swab into flux as shown. (Recommended: the
Anti-Static Swab and
tack
NoClean Flux).
Step
5B
Remove Excess Solder.
Using fluxed swab, gently push residual solder into a single sphere and remove with solder sucker or push up onto a card.
Step
5C
Repeat Step 5b.A good rule of thumb: repeat cleaning with a new, large
foam swab dipped again in flux. This second flux swabbing
polishes pads in prep for new SMD placement.
Step
6A
Cool Down & Final Cleaning. Flip rocker switch of
ZT-1 AirBath to "Cool" mode to cool down PCB. Insert large anti-static foam swab into flux remover. (We
recommend
A
Non-Flammable Flux Remover.)
Step 6B
Swab PCB with Flux Remover.
As PCB cools under
ZT-1 AirBath, swab area where SMD was removed with Flux Remover as shown.
Step
7
Video
Demo: SMD Removal & LowMelt®
Inspect.Inspect your substrate and pads. Turn off
ZT-1 AirBath. Note: the entire removal process was with non-contact warm air below
150°C.
Now that you have successfully removed your SMT component, it's just as easy to place and solder a new one back onto the pads. For SMD placement and soldering, please be sure to see our full color, step-by-step Process Guide at "SMD Soldering As It Should Be"
or check out the short, but helpful video at the
right.
Click to learn more about the history and benefits of the popular Zephyrtronics
LowMelt®DeSolder.
Please note: Zephyrtronics has packaged all of the above described chemicals, anti-static swabs,
LowMelt® DeSolder and more in our
LMK Benchtop Kits...our BluePrint for the Bench™.
Please make sure that you check out both of our classic
Leaded and our Lead-Free Benchtop Soldering / DeSoldering
Kits.
The Amazing
LowMelt® DeSolder is available right now in our convenient storage/shipping tubes (shown at right) in either of the two following popular quantities (Each shipment includes a Certificate of Metallurgical Compliance from the Zephyrtronics Quality Group and MSDS).
LOWMELT®
DE-SOLDER WIRE
Description
Item
Price
Buy Now
Classic,
Traditional
LowMelt®
De-Solder Wire
With Lead
LMS-0137 LOWMELT® DE-SOLDER WIRE ( 137cm / 4.5 ft )
$31.00
LMS-0243 LOWMELT®DE-SOLDER WIRE ( 243cm / 8 ft
)
$51.00
LMS-0487 LOWMELT® DE-SOLDER WIRE
(
487cm / 16 ft )
$92.00
LMS-0975 LOWMELT®
DE-SOLDER WIRE (
975cm / 32 ft )